
We like to call that spinny ball the beachball of death. It tells you that your computer is thinking about something, pulling data from your hard drive, or both. No matter how powerful your Mac, you’re bound to see the beachball every now and again.
We like to call that spinny ball the beachball of death. It tells you that your computer is thinking about something, pulling data from your hard drive, or both. No matter how powerful your Mac, you’re bound to see the beachball every now and again.

Okay Baltimore, let’s talk about your slow computer and how to repair it. It’s something we all struggle with from time to time and it’s nothing to be ashamed of and it’s nothing you did wrong – slow computers happen to everyone. Thankfully, sluggish computer performance is totally fixable, even if the underlying problem is pretty complex. Never forget, you can always call Poindexter if things get hairy. We offer inexpensive computer tune ups for both PC and MAC and love a challenge.
Here are the top three things that can slow down your computer and simple ways to fix them.
By far the most common problem we find on slow computers is the sheer number of programs running simultaneously. It’s normal for a computer user to add and install all sorts of neato programs, but if those programs run too often and aren’t closed properly, they’ll take a chunk out of your performance. Like people, computers have limited attention spans and the more things they have to keep track of, the slower they crawl. Programs aren’t an easy feat and each one requires some amount of brain power (the processor) and memory (the RAM). If there are too many programs running, the processor and RAM can get overloaded, bringing the whole computer to a crawl.
Not all programs tell you they’re running and finding the hidden ones can be tricky, but there’s a good, quick step to try first. In the lower right hand corner of your Windows PC, to the left of the clock, you’ll see a series of little icons. Each icon represents a program running (you might have to click the little arrow to see all of them). Look over each program and decide whether or not it’s worth having. If not, uninstall it or go into its settings and stop it from starting with Windows. If you absolutely must have each program or utility, consider investing in more RAM to free up some working space for your computer.
Viruses and malware are programs that run on your computer and, like any program, malware can gobble up resources. Some malware disguises itself as anti-virus or optimization software. We call these “potentially unwanted programs” and they should be uninstalled immediately. Software promising to update drivers, offer free backups, push you to buy something, or warn your of impending computer doom are almost certainly yuck malware and need to be kicked to the curb. If uninstalling them doesn’t work, consider calling Poindexter for a thorough cleaning. Beware that not all programs announce themselves to Windows and might be running in the background, hidden from view but still using up precious brain power. Some malware is front and center, leaving little doubt that they’re causing problems. Not all malware plays nice and let’s you uninstall it – in fact, some will reinstall themselves and their buddies immediately after you reboot. This can be very frustrating. But take heart! Poindexter can repair your computer.
Malware run amok can eat up memory, disk space, brain power, and make unauthorized changes to Windows and other programs, causing nastier problems than just slow performance. Crashing, weird errors, and other strange behavior all result from untreated infections and need to be dealt with quickly and completely. Uninstalling unwanted programs can free up lots of computer resources, improving stability, boot time, and system speed.
A hard drive is the permanent storage of your computer; it’s where all files, images, music, movies… everything, gets stored. If you open up a hard drive, you’ll find a polished metal disc and a reading arm, sort of like a phonograph, but way more sensitive. Your data gets saved to this disc as a series of magnetic ones and zeroes. As the disc spins, the reading arm is able to read that code and send it to the processor which puts it all together as that adorable cat picture you saved four years ago and forgot about.
If your hard drive is running low on storage space, Windows can get claustrophobic. Windows loves having lots of elbow room to work – to do its job, Windows needs to make files, unpack stuff, and move stuff around. If there’s too breathing room, Windows can slow down severely or even crash.
Every file on your hard drive gets moved around as new stuff gets added and removed. With regular use, the contents of your hard drive can get disorganized, leaving stuff scattered around, forcing the hard drive and processor to work harder to put everything together correctly. We call this fragmentation and, naturally, defragmenting your hard drive every now and again can improve boot time and performance.
To defragment your computer’s hard drive, just search for defrag using your Start Menu’s search bar. The program “Defragment and Optimize Drives” or something like it will pop up. Select that and follow the instructions as they come up. If you haven’t defragmented in a long time (a year or longer), settle in for a long haul. This might take awhile.
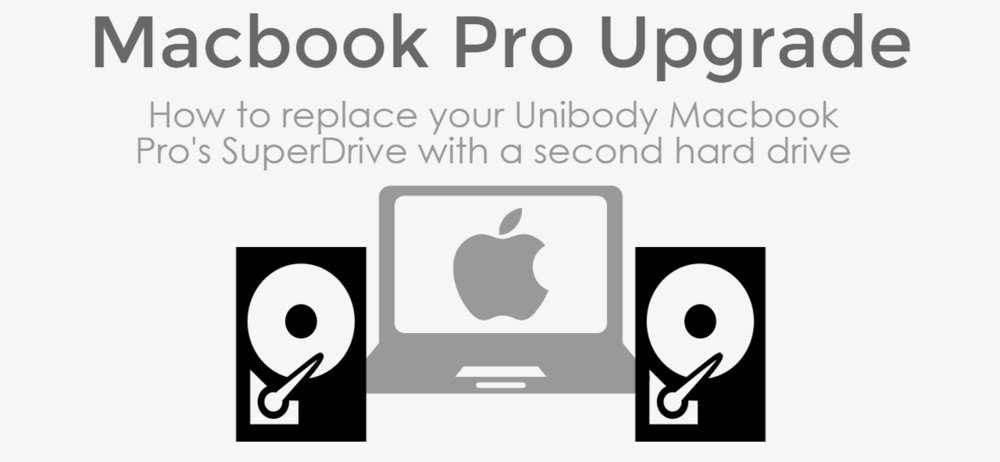
If you’re like me, the DVD drive in your unibody Macbook Pro (mid-2012 model or earlier) is just going to waste. With most software hosting going to the web and file sizes swelling, there’s reduced need for disc based media and increased need for fast, local storage.
In my own Macbook Pro, I replaced the original hard drive with a Samsung 850 Pro SSD (solid state drive) resulting in drastically improved performance, as well as a left over 500 GB Hitachi laptop drive. Although the drive’s performance wasn’t quite to my standards, especially for running OSX Yosemite, it would be great for slower access storage.
We need a way to get this extra hard drive into that unused SuperDrive slot.
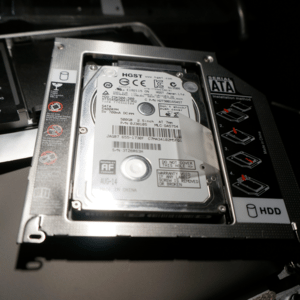
Amazon and other online vendors sell a low-cost sleeve or tray that fits around the hard drive and adapts it to the SuperDrive slot. With the right tools and a steady hand, removing the old disc drive and replacing it with a new hard drive should only take about thirty minutes. For this demonstration, I’ll be using a Macbook Pro mid-2012 model – this was the last series released with a disc drive and without a Retina display.
First, we need to procure the hard drive tray. For this tutorial, I’m using a well reviewed, inexpensive tray from Amazon. As you can see, the tray just adapts the hard drive’s SATA connector to the Macbook’s SuperDrive size, shape, and connection type.
The hard drive tray has four screws for each corner of the drive. Remove each screw, then gently place the hard drive inside the tray. Using a small tip Phillips head screw driver, replace each screw. If the drive is correctly lined up inside the tray, each screw will sink into a hole inside the drive. When done, the drive will feel securely fastened to the tray.

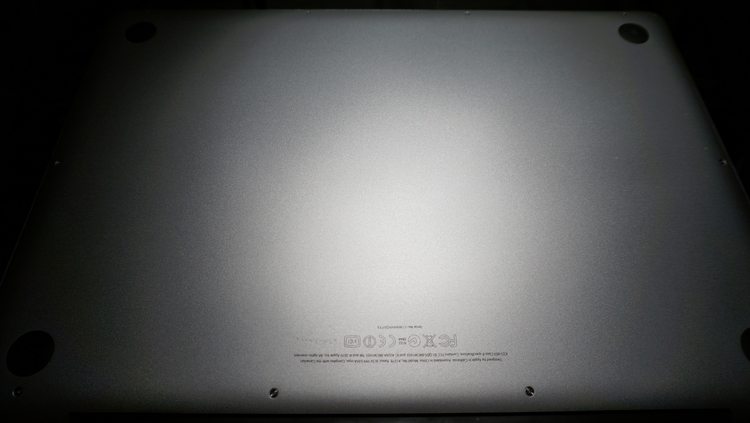
Next, we need to remove the bottom plate from our unibody Macbook Pro. The underside of a Macbook Pro uses ten tiny screws to fasten the aluminum plate to the chassis. Carefully remove each screw, and make sure not to apply too much pressure. Although the screws are well made, stripping one can make removal very difficult. Set the screws aside and make note of the three long screws; they’ll need to be replaced in the correct spots along the hinge once we put everything back together.
Now that we’ve got the bottom plate off, behold the inner beauty of your Macbook Pro. With the hinge pointed away from you, the SuperDrive should be to the right, just below the hard drive. You can see my juiced up Samsung 850 Pro in the top right corner and the SuperDrive just below it.
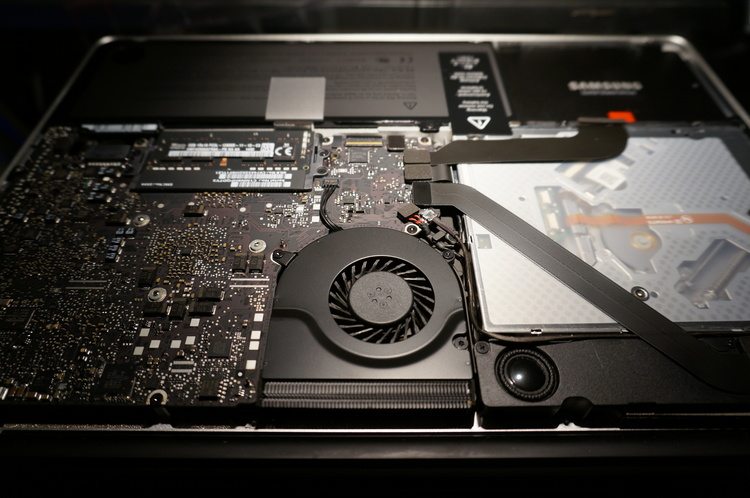
The SuperDrive is secured by a handful of small screws that are easy to damage. Make sure your screw driver is appropriately sized and has a well defined tip. I’ll be using a PH0 Phillips precision screwdriver for this.
Using your finger tips, gently remove the four attached cable heads and very carefully fold the top and bottom cable away. Do not bend or twist them. We just need to clear a little space to remove the Super Drive and expose the mounting screws.
With your precision screw driver, remove each of the screws shown. Four screws secure the SuperDrive to the case. Just below the SuperDrive are five more screws that hold the speaker and wifi adapter in place. Although we don’t need to remove either the speaker or the wifi, we need to loosen them in order to remove the SuperDrive beneath. Again, make sure to note the location of each screw; they’re of different lengths and must be put back in the right order to avoid damaging your Macbook Pro.


Once all screws are removed and the cables out of the way, you should be able to wiggle the SuperDrive out of its slot, sliding it out from underneath the speaker and wifi adapter. If you feel any resistance, go back and make sure all screws have been removed. Do not force anything.
If you inspect the SuperDrive, you’ll find one short cable attached, along with a mounting arm secured with two screws. Remove each and install them into the corresponding location on the hard drive tray.
Slide the prepared hard drive tray into the vacated space and line up the screws. Replace each mounting screw. Do not over tighten. Position the speaker and wifi adapter and replace those screws as well.
Line up each of the four cables and carefully plug them back in. Gently tuck the wifi adaper cable along the bottom edge of of the drive tray. Apply careful pressure to plug in each cable. They should snap into place easily.
Do a final inspection to make certain all screws are in place, that all cables are plugged in, and everything looks correct. If so, go ahead and replace the bottom plate, making sure to get those lengthy screws back into place along the hinge.
Power your Macbook Pro up and, using Finder, navigate to your new drive and bask in the glory of massive Macbook storage without paying Apple’s hefty asking price.
If you run into trouble or don’t want to risk damaging your Macbook Pro, be sure to call Poindexter for a free consultation and low-cost upgrade.